Course Information
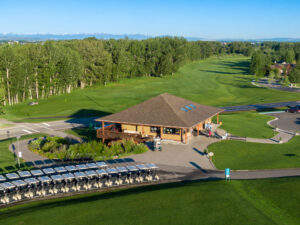
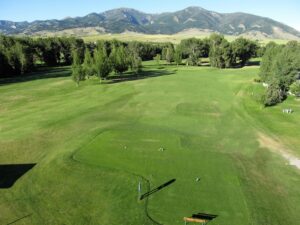
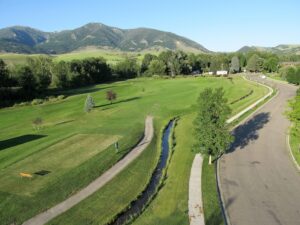
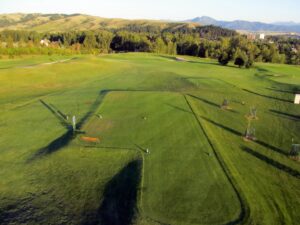
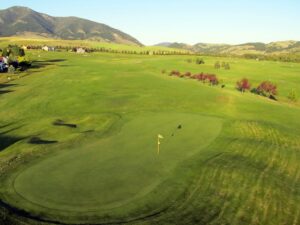
We welcome you to Bridger Creek. Located at the base of the Bridger Mountains, only ten minutes from historic downtown Bozeman, Bridger Creek enters it’s 30th year as one of Montana’s most scenic and challenging golf courses.

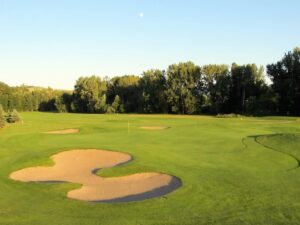
Located at the base of the Bridger Mountains
Having hosted two U.S. Amateur qualifiers and many state and regional tournaments the course continues to draw rave reviews for it’s condition and complexity. But tournament competitions are just a small part of our golf season activity.
Teaching people the great game of golf is our major focus. Montana’s only Nike camps, the summer long junior academy, turf mites and pee wees and our adult group lesson programs add up to the largest teaching program in Montana. All these programs are taught by our two PGA professionals and two PGA apprentices. The teaching is done at our own Rocky Mountain Golf Academy the Northwest’s premier short game and full shot practice facility.
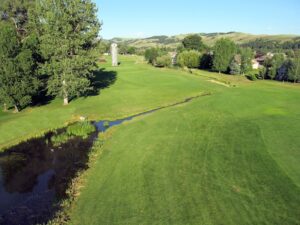
Bridger Creek and Rocky Creek form the confluence of the East Gallatin River directly behind the second green. Just 35 miles west, at the Headwaters State Park, the Gallatin, Madison and Jefferson Rivers join to form The Missouri River. At 2500 miles the Missouri is the longest river in the United States and the fourth longest on the planet.
Course Map

Course Architect
Mac Hunter

Bridger Creek Golf Course designer, MacGregor (Mac) Hunter, was a very accomplished player. He competed in 23 major championships including 11 US Open Championships, 2 British Opens and 6 PGA Championships. He won the California State Amateur, The Mexican Amateur and defeated Arnold Palmer to win the U.S. Junior Championship.
Mac has a long and famous golf heritage. His Grandfather, Harry Hunter, was head professional at Royal Cinque in Portsdeal England for 45 years. His father, Wee Willie Hunter, was a British Amateur Champion and Head professional at Riviera Country Club in Los Angles from 1936 until 1964. Mac followed his father and was Riviera’s head professional from 1964-1973.
Mr. Hunter was the design consultant and /or project manager for golf courses around the world; San Gil, Mexico-Pete Dye Designer; Mirage CC Port Douglas, Australia-Peter Thompson Designer; Princeville, Hawaii-Robert Trent Jones II Designer, to name a few.
Course Tour
Hole #1
| Par | Yardage | Handicap | |||
4 |
Blue | White | Red | Men | Women |
| 383 | 356 | 269 | 11 | 11 | |
Hole #2
| Par | Yardage | Handicap | |||
4 |
Blue | White | Red | Men | Women |
| 414 | 399 | 296 | 1 | 3 | |
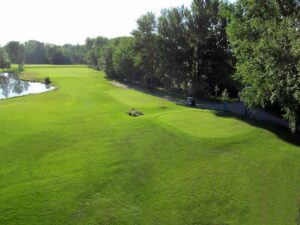
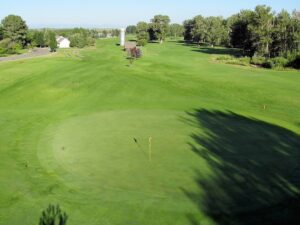
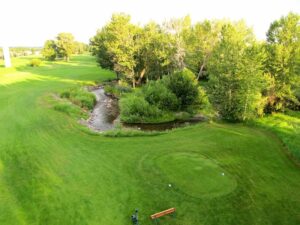
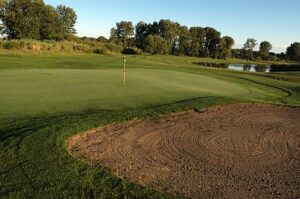
390 yards seems like an easy task….but three bunkers left..and a narrow, level green set between two creeks soon gets your attention. Hit the green with a soft landing shot and life is good…miss left, long or right and, if you’re not wet, the chip will be challenging. The best miss is slightly short.

Hole #3
| Par | Yardage | Handicap | |||
5 |
Blue | White | Red | Men | Women |
| 487 | 466 | 401 | 7 | 1 | |
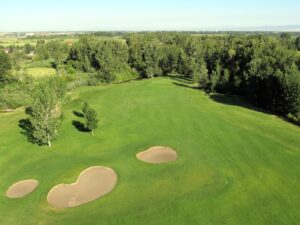
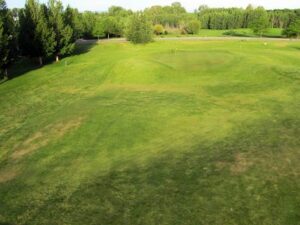
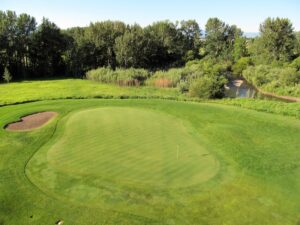
A short par five where big hitters can have an iron into the green….but the green doesn’t want to be hit. It’s elevated with steep slopes off the back and right…. bunkers is front….out of bounds left for a pulled shot….so the wise move is often lay up short and have a straight forward pitch in, instead of a trick shot from the locations mentioned above. This green offers on of the many putting adventures to be found at Bridger Creek.

Hole #4
| Par | Yardage | Handicap | |||
3 |
Blue | White | Red | Men | Women |
| 169 | 157 | 148 | 15 | 13 | |
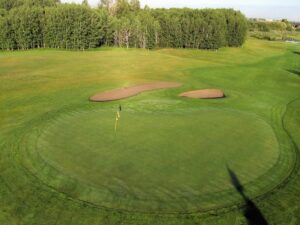
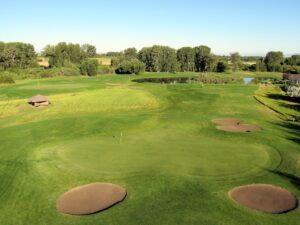
A solid par three with a two tiered green…again a ball left in front, short of the green, has a better chance of being chipped close for a par than anything right, left or long. Just pick the right club and knock it on.

Hole #5
| Par | Yardage | Handicap | |||
4 |
Blue | White | Red | Men | Women |
| 385 | 374 | 323 | 5 | 5 | |
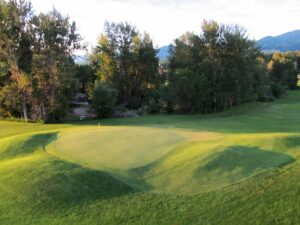
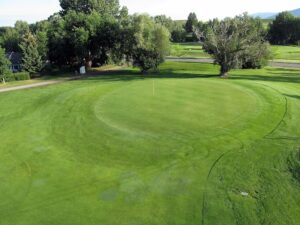
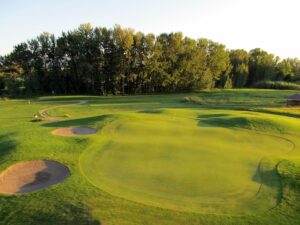
Easily the hardest green to hit, and hold, on the course. Small, round with steep sides and elevated. How to get a par? Have a high lofted club in for your second shot and if you miss, don’t miss on the short side. Ignore the water left and the OB right on your tee shot…just aim at the 150 yeard pole in the middle of the fairway. Get a par and you’re gaining on the field.
Hole #6
| Par | Yardage | Handicap | |||
4 |
Blue | White | Red | Men | Women |
| 383 | 356 | 269 | 11 | 11 | |
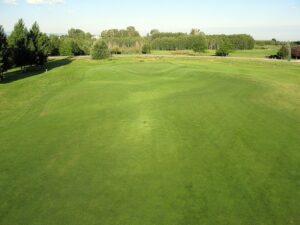
Straight away par 4 with lots of fairway to hit. Birdie time….as long as you’re not expecting a straight putt once you reach the geen.
Hole #7
| Par | Yardage | Handicap | |||
4 |
Blue | White | Red | Men | Women |
| 423 | 408 | 342 | 9 | 9 | |
Dogleg left begins in earnest about 250 yards from the tee….big mounds on the left cause big problems if you’re not long enough to carry them. Again there’s nothing wrong aiming at the 150 yard pole and having a smooth iron into the good sized green. Remember big mounds..big problems.

Hole #8
| Par | Yardage | Handicap | |||
3 |
Blue | White | Red | Men | Women |
| 183 | 174 | 121 | 17 | 17 | |
Generally you can use the same club you used on #4. This green is easier to hit, bigger and less severe all around. That said putting is no picnic, so pay attention to your chip or first putt. No dozing near this green.
Hole #9
| Par | Yardage | Handicap | |||
5 |
Blue | White | Red | Men | Women |
| 498 | 475 | 383 | 3 | 7 | |
Another Bridger Creek short par 5 frought with problems. Trees and water right, huge trees to avoid 150 yards from the green and water left and long of the green. A well placed drive down the middle or right side of the fairway is the most important step to a birdie. Then thread a shot between the two monster cottonwoods guarding both sides of the fairway and you could be on the green. For women this is a birdie hole like no other…383 yards…get after it!

Hole #10
| Par | Yardage | Handicap | |||
4 |
Blue | White | Red | Men | Women |
| 420 | 371 | 311 | 6 | 6 | |
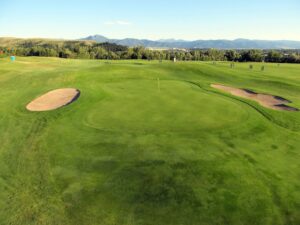
The wide open spaces and big greens have arrived but so have their friends; bunkers,mounds and undulations. Fun. A big high long fade will make this hole easier. Too far right brings in rough, trees and a shot over the greenside bunker.

Hole #11
| Par | Yardage | Handicap | |||
4 |
Blue | White | Red | Men | Women |
| 156 | 128 | 107 | 16 | 16 | |
Short par three with a green featuring two distinct tiers. Putting up to one or down to the other is not advised so plan accordingly.

Hole #12
| Par | Yardage | Handicap | |||
4 |
Blue | White | Red | Men | Women |
| 365 | 338 | 249 | 12 | 12 | |

Hole #13
| Par | Yardage | Handicap | |||
5 |
Blue | White | Red | Men | Women |
| 516 | 496 | 435 | 10 | 4 | |
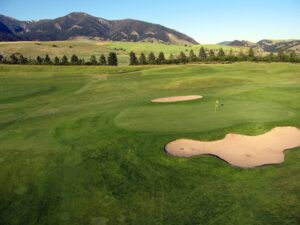
Another par 5 where a birdie is possible if you get your drive in the fairway. The wide open looking fairway and the stunning views of 5 mountain ranges can be disconcerting. The rough is gnarly so don’t go there. It’s not easy to see the second shot landing area but there’s plenty of room so blast away….keeping in mind a pitch from the rough might be difficult. The green runs away from the fairway slightly left to right.

Hole #14
| Par | Yardage | Handicap | |||
4 |
Blue | White | Red | Men | Women |
| 418 | 387 | 270 | 4 | 8 | |
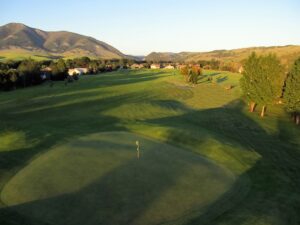
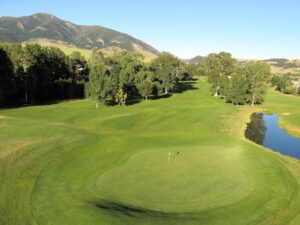
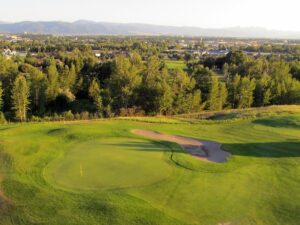
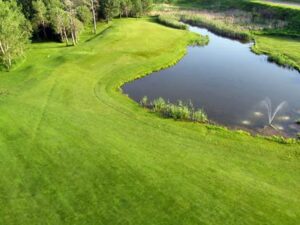
The start of Bridger Creek’s version of ‘Amen Corner’ the next three holes usually determine a golfers score on the back 9. The 14th green rests behind a lovely artesian well supplied pond. Whether you lay up or go for the green will depend on your drive, lie and course management skills. If laying up is your choice try to get in the left side of the fairway, and at your favorite distance, as the green opens up and the pond less in play from the left side.

Hole #15
| Par | Yardage | Handicap | |||
4 |
Blue | White | Red | Men | Women |
| 201 | 165 | 115 | 14 | 14 | |
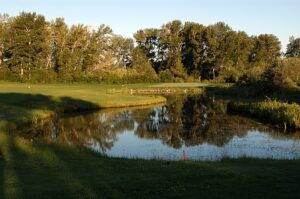
From the blue tees easily the hardest par 3 in Montana. 200+ yards to a green with OB right and lateral hazards front, left and back. Ouch…laying up on a par 3? It’s not so difficult from the white tees but still there is little room for error causing many golfers to tighten up and not make their best swing. Commit…relax…swing…putt for birdie.


Hole #16
| Par | Yardage | Handicap | |||
4 |
Blue | White | Red | Men | Women |
| 400 | 368 | 278 | 2 | 10 | |
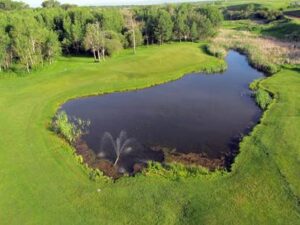
Sharp dogleg left with water everywhere left. From the white tees it’s just 213 to the 150 yard marker with some wiggle room to the right. That’s your target unless you’re blasting it over the pond to the green which is not visible from the tee box. Over the pond is a solid 245+ yard carry with OB left and water in front. This is a good start to a double bogey or more. The green is large with two tiers, so pick your 2nd shot iron properly. Being on the opposite tier from the pin will be a putting challenge.

Hole #17
| Par | Yardage | Handicap | |||
4 |
Blue | White | Red | Men | Women |
| 128 | 120 | 110 | 18 | 18 | |
The shortest hole on the course deserves to have the trickest putting surface. If you have a straight putt on 17 you’re probably putting from two feet or less. Still it’s a good size green and from only 120 yards a par is a reasonable expectation.
Hole #18
| Par | Yardage | Handicap | |||
4 |
Blue | White | Red | Men | Women |
| 582 | 512 | 438 | 8 | 2 | |
From the shortest hole to the longest hole on the course. This is a strong finishing hole, especially from the blue tees, measuring 582 yards. Off the tee the left side of the fairway is preferred to allow a clearer shot towards the green. Too far right off the tee and you’ll be blocked by the huge cottonwoods along Bridger Creek. The large rolling green has a mound in front that disguises the true distance to the putting surface. Get your yardage right and trust it otherwise you’ll come up short.